Tutorial by Matis Palm - If you any questions, please do not hesitate to write to [email protected], I'll be glad to help you!
Other tools available to watermark photos : http://www.obviousidea.com/tutorial-light-image-resizer/ , https://www.watermark-image.com/, https://www.watermark.ws/home (only text ), http://www.visualwatermark.com/, Photoshop Script Tool
About this tutorial
This tutorial was originally created by Matis Palm in May 2015. If you have any comment or question, feel free to contact him at [email protected].
Have you ever needed to add watermarks to your photos, but lack the skills or knowledge to how?
Here's a quick guide to use a homemade tool made by one of our members Josef Minarik from ESN Tallinn.
The guide takes about 5 minutes and the tool might need some getting used to it, but after a few tries, it's very easy to use!
Here's an example, of what the watermark looks like on one of our pictures :

Now to the point - first you need to download the program : I'll just call it the "Watermarker" here -
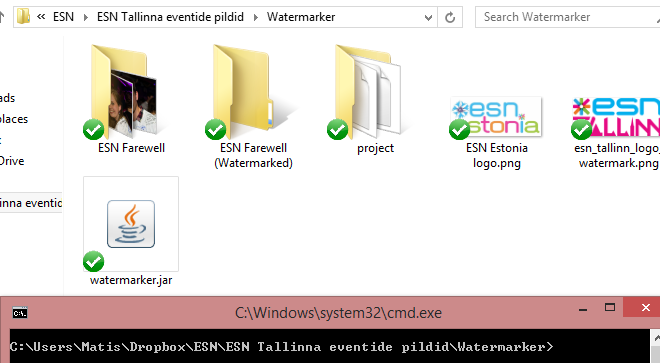
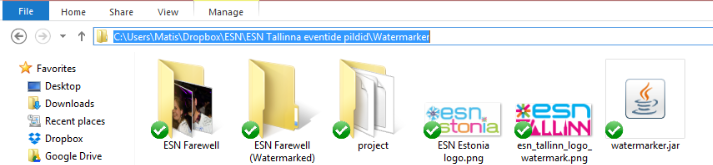
You need the "project" folder, the watermarker.jar and for references I've added our logos there to try out (your logo should preferably be in .png format and with about 50% transparency/opacity, so it blocks the minimum amount of the picture.) - The Dropbox folder is here :
Your folder should look something like this (the watermarker.jar and the logo suggestably next to the folder with the .class files)

Next you should have your folder with your pictures and a folder for the watermarked pictures
For consistency I usually use the event name for the main folder and add (Watermarked) for the watermarked pictures, it should look something like this (In my example I have "ESN Farewell" with the pictures ready to be watermarked and "ESN Farewell (Watermarked)" as the empty folder to send the watermarked pictures to :

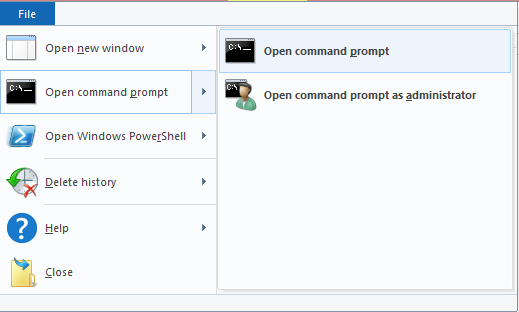
Next up we have to open the Command Prompt as it's called in Windows (It's a command prompt program, but don't be afraid of it! - it's fairly logical to use) If you're using Windows 8 or 8.1, you can just open the Command Prompt by going to File -> Open Command Prompt here.

If you're not for some reason - then you have to search for "Cmd" in the program menu, click Windows button + R (Also works on Win 8 and 8.1) or search for "Run" and then type in "Cmd"

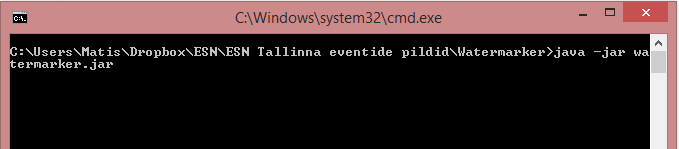
If you open the Command Prompt on Win 8.1, then it will automatically be in the right directory for you (otherwise you have to use the command "cd" - short for "Change Directory", followed with your full directory, which you can also get when you click on the directory line on top of the folder view - in our example, you would have to type "cd C:\Users\Matis\Dropbox\ESN\ESN Tallinna eventide pildid\Watermarker"

Next, we'll finally be running our program, by using the command "java -jar watermarker.jar"

Next up is just filling the answers (be precise with the directorys, as it doesn't create it's own or allow false directories - it responds by saying that you have a error in the directory and that you should try again - all characters are counted, so be careful!) A tip is that, you can use the up arrow to get your last line entered (so when your folder with Watermarked images is in the same folder tree, then you need to type less!) Command line is quite restricted with copying inside it, although you can copy from everywhere else and paste into it by right clicking inside the black area and clicking "paste" . If you want to copy from inside Command line, you need to "mark" the text you'd like to copy and then press the right mouse button (it isn't very convenient)
In the end with all the questions answered it should look something like this :
Watermark opacity with 50 (Default - just press enter) should work fine usually.
If the images are bigger than 2000px, I usually resize them to 2000px, but this depends on your logo size (look at your first pictures, to make sure your watermark is not too big or too small)
The usual alignment I use is "BOTTOMLEFT" - you have to write it out like that (otherwise it will use the default MIDDLE)
The usual offset for me is the default (how far into the picture do you want your watermark)

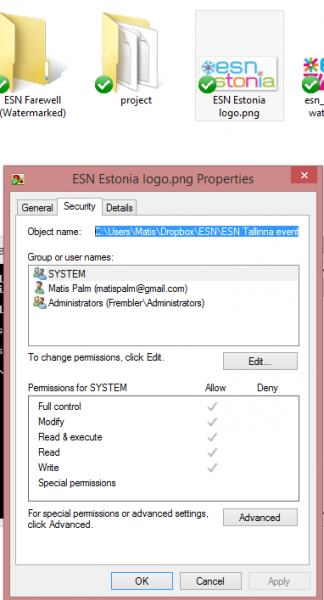
The easiest way to get the path to the Watermarker logo you wish to use, is to right click the image, go for properties and check "Security" - you can easily copy the path from the "Object name" line (watch out for the "?" you might get into the start of the row, or a "space", which will fail the process and you can try entering it again.